Contents
Content is the bricks of your website, add content to the page and create your own website.
How do I insert a new content?
To insert a new content, use the left menù on the website.
Click button  for insert new content.
You can enter texts, images, forms, forms and pngs, menus (navigation bar), rotating images, photogallery, vertical and horizontal menus,
buttons, videos, Google maps, pop-ups, tables, files, html code, scrolling text, social network links, newsletter and clock links.
 Photo
Photo
Click Contents button
on left menù.
Then click the PHOTO button
 to insert an image.

In our case the image is the LOGO. On the template appears an image, click the arrow button in the corner
top left of the image and load the Logo from your PC.

Logo is an image in your PC, usually a jpg, gif or png file.
Now move the position of your Logo and resize the logo by moving the balls that identify the image space:
 Menu (navigation bar) and pages
Before embedding the website navigation bar, we recommend creating pages, that is, the page name
of the website (Homepage, Who we are, Where we are, Contacts, etc.)
Click the PAGE button
 in the left menu.
The list of pages present is opened.
in the left menu.
The list of pages present is opened.
Delete the pages you do not need with the DELETE button
X,
Drag the position of the pages with the mouse to change the order or change the name of the page by clicking on the MODIFY button


Create a new page by clicking the NEW PAGE button

Now, click the CONTENT button
 to enter the Menu
Click the MENU button to enter a men & ugrave; horizontal or vertical
Click the Horizontal Menu button.
This is the menu (navigation bar)

Move the menu position and resizes the menu as you did for the logo, dragging the balls on the menu margins.
How to change the menu (navigation bar)
To access the editing options for each content, you need to right-click on the content and click on the button
Options on the menu that appears.
You can change many menu values from the Options menu.
Size, pages to display, color, text fonts, etc.
Use values
Width
and
height
to define the size of the menu.
Check the checkbox
width 100%
to get a wide-screen menu (optional).
Check the checkbox
Centered
to automatically place the menu at the center of the page.
Check the checkbox
Fixed position
in the case of a page with full-screen images where necessary
set a fixed position of the menu that is valid for all resolutions.
Continue to change the menu settings by customizing the background color, color, and fonts
of texts (page name), creates a spacer between pages, edits edges, creates shadow, and so on.
Always remember to click the button
Save
so you do not miss the changes made.
 Slideshow: Rotating images
You can complete your Header by entering, in addition to the Logo and the Menu, rotating images.
Click the Content button
in the left menu.
Then click the SLIDESHOW button
 to insert rotating images.
to insert the rotating images. Set the position of the image that appears on the website, resize by moving the balls that identify the image space:...

Now upload the image from your pc. Click on the arrow buttons
in the upper left corner of the image and proceed to the upload.
Repeat the procedure for all the pictures you want to include in the slideshow.
After uploading the images you can crop them to get a correct view of the image. Click the RETURN button
 use the buttons
 and
and
 To zoom in or out of the image, drag it with the mouse to change the position, then click the APPLY button
 to complete.
To crop other images, click the Crop button
and scroll with the left buttons
<
and right
>
to change the image.
Wait for uploading the new image to make the changes.
Full Screen Slideshow - Width 100%
Often slideshow images are displayed across the screen width.
To get this result you need to access the options.
Right-click on the image and access the options. In the menu that appears, click the OPTION button.
In the left menu, you will see all available options to edit your slideshow.
You can change the size of the Slide with the Length and Height values.
To make the image occupy the entire screen horizontally, check the checkbox
Width 100%.
 Text
Text
Add text to your website. Click the Content button
in the left menu.
Click T button
 to add a Text Content to the page.
Position the text where you like, change the size as you like.
Click the T button to access the word formatter, with which to edit the text and formatting.

After you've typed the text, click Save to confirm the changes.
The text can be entered in all the languages on the website.
 Form
Form
Add a form to your website. Click the Content button
in the left menu.
Click the button
 to add a Form Content to the page.
Position the form you prefer, change the size at will.
Access the Options to manage the background, edges, and colors of the form, colors, fonts, and text and input fields.
Click the button
 to access form fields management.
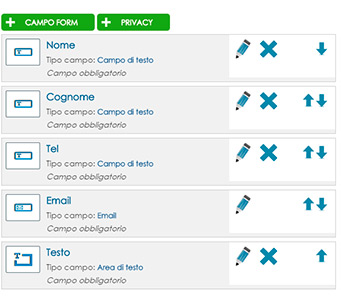
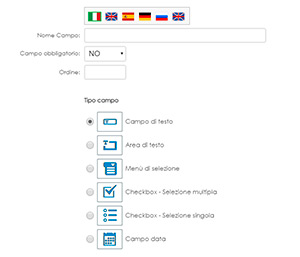
Enter, edit, and move order forms fields.
You can create input fields, checkboxes (multiple selection), radio (single selection), drop-down menus, text areas, and date fields.
The email sent from the form will be saved in the Notifications section of the CMS and delivered to the mail linked to the website.
 Photogallery
Add a photogallery to your website. Click the Content button
in the left menu.
Click button
 to add a Photogallery Content to the page.
Position the photogallery where you like.
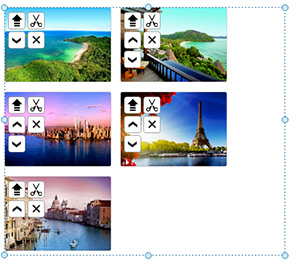
Access the Options to manage the number of viewable photos, the number of photos per line, the size of the photos, borders, backgrounds, etc.
Click button
on each single photo to change the photo.
Click button
 to make a multiple photo upload in the gallery.
Click button
 to move order pictures.
Click button
 to delete a photo from the gallery.
 HTML code
Add Html code to your website. Click the Content button
in the left menu.
Click button
 to add a Html Code Content to the page.
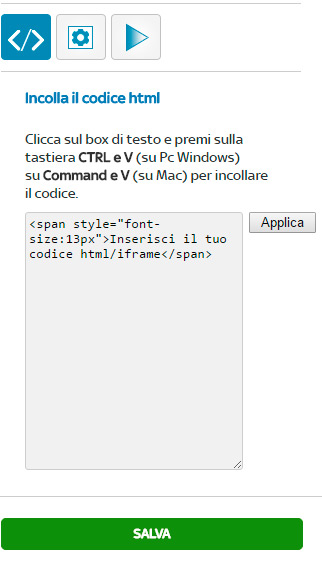
Through this content you can import on the iframe or white label website of the tupo suppliers,
links to other websites or social networks or any other html code.
Position the Html code where you like.
Access the Options to paste the code and manage the graphic options,
 Box
Box
Add a Box to your Website. Click the Content button
in the left menu.
Click button
 to add a Box Content to the page.
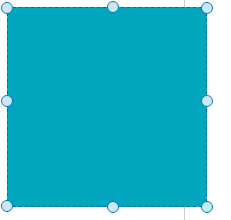
Position the Box where you like.
Access Options to Manage Background, Edge, Size, etc.
Use the box to build parts of the template, for example you can use the box as a menu background, apply opacity to use
the box as the background of a text, or you can create a column.
Apply rounded edges to create a circle.
Take advantage of the box as you believe in the realization of your page.
 File
File
Add a Downloadable File to your Website. Click the Content button
in the left menu.
Click button
 to add a File Content to the page.
Position the File you want.
Access the Options to manage the file to upload (image).
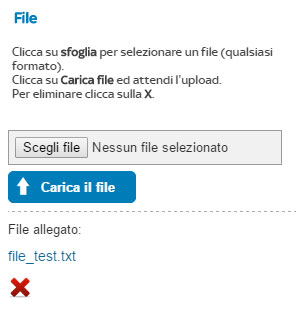
Select the file from your PC, click on "Upload file" and wait for upload times.
You can also manage the icon and the font of the text.